In this article I want to show you how to install and configure Domain Controller running the latest Windows Server 2012 OS. Note that for the following demonstration I will be using a Virtual Machine and my test environment works at the Windows Server 2008 R2 functional level.
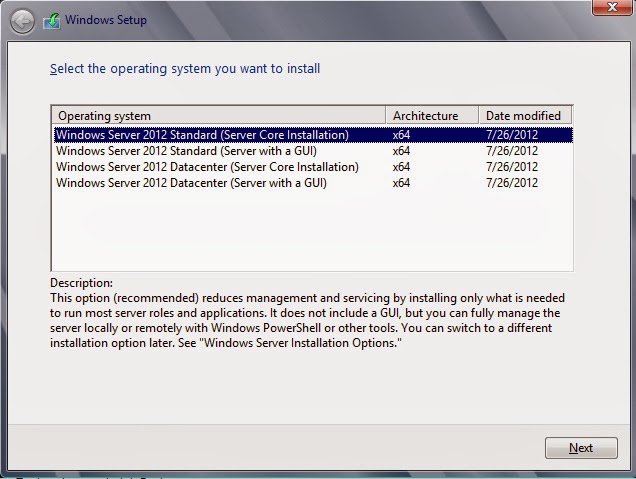
Once you've started the VM and configure all the necessary hardware details, the server will boot and the Installation Wizard will start. I'm using an ISO file attached to my VM that includes multiple Windows Server 2012 versions. From the available Operating Systems I will choose Windows Server 2012 Datacenter (Server with a GUI)
Once you click "Next", the installation process will start. You will need to wait until the installation is completed and the server is rebooted:
After the restart, all the necessary components will be configured. This operation will take some time depending on the Server's hardware configuration:
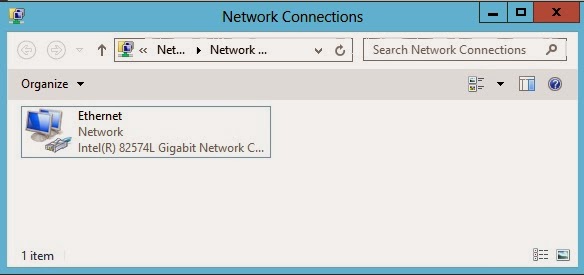
The first thing that we need to do is to set up a static IP address. Navigate to Control Panel\Network and Internet\Network Connections and select the network interface connected to your network:
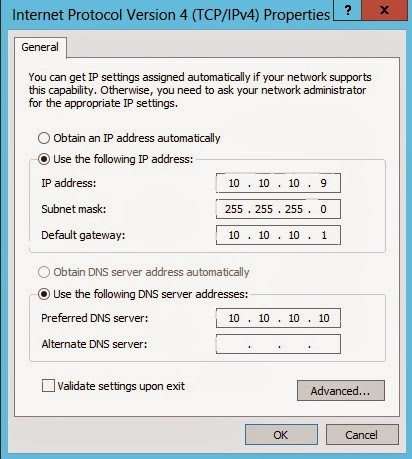
Now right click the network interface and select "Properties", navigate to Internet Protocol Version 4(TCP/IPv4) and set up the IP configuration. Note that you should always use a static IP configuration for your Domain Controllers. If for whatever reason you decide to use DHCP servers for assigning IP addresses, make sure you create a failover infrastructure:
We can achieve the same results using the netsh command from command prompt:
netsh interface ipv4 set address “local area connection” static 10.10.10.9 255.255.255.0 10.10.10.1
netsh interface ipv4 set dnsservers “local area connection” static 10.10.10.10
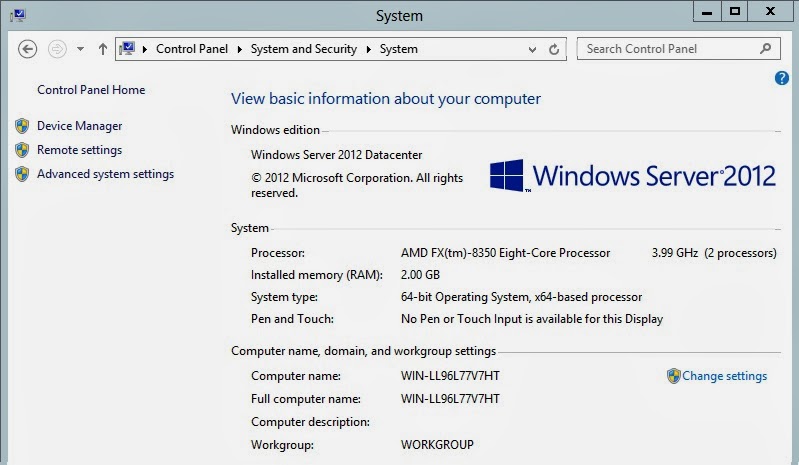
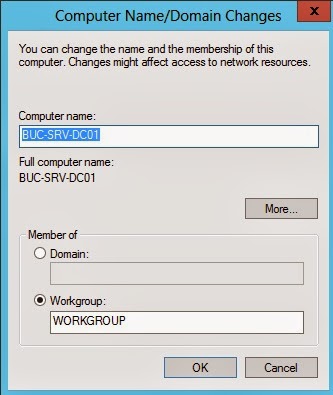
I will also change the name of the server. Navigate to Control Panel\System and Security\System and click on "Change settings" from the Computer name, domain and workgroup settings section:
Now change the server's name and press "OK". You will need to restart the server after this step is complete:
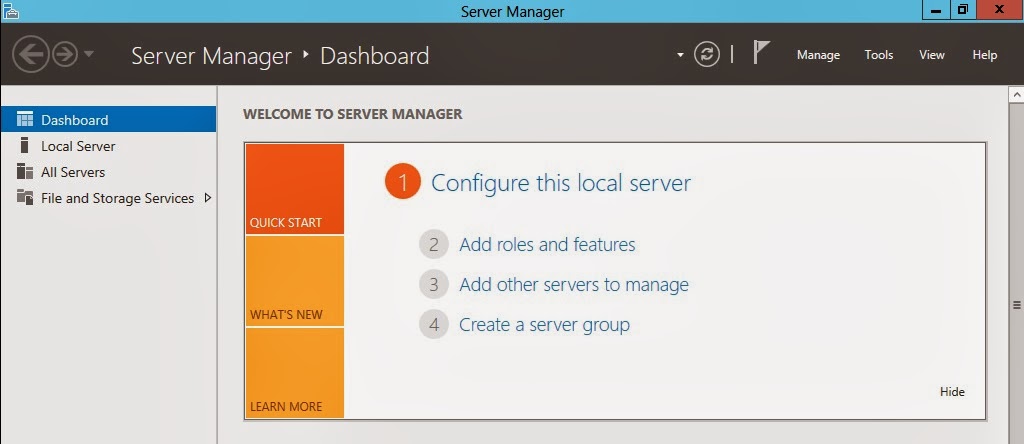
Now it's time to install and configure the Active Directory Domain Services role. Open the Server Manager console and click on "Add roles and features" button:
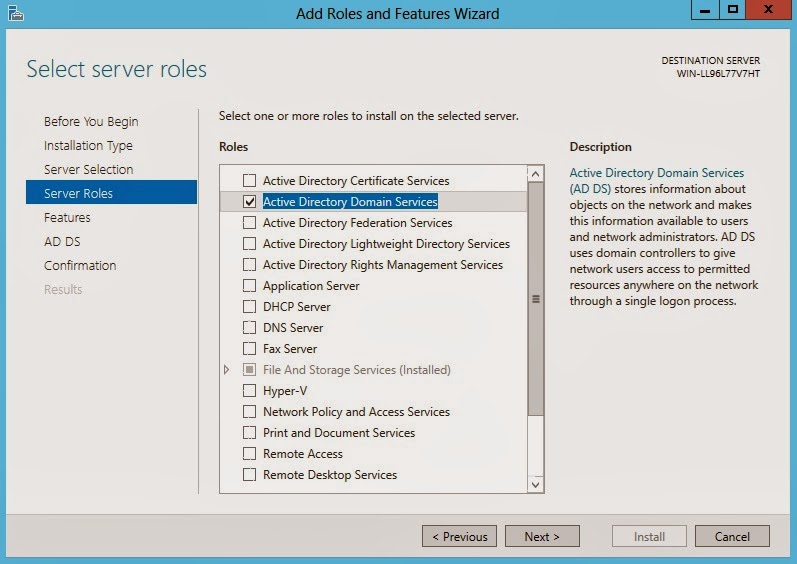
From the roles section, select "Active Directory Domain Services" server role. You can also read the short description available on the right side of the panel:
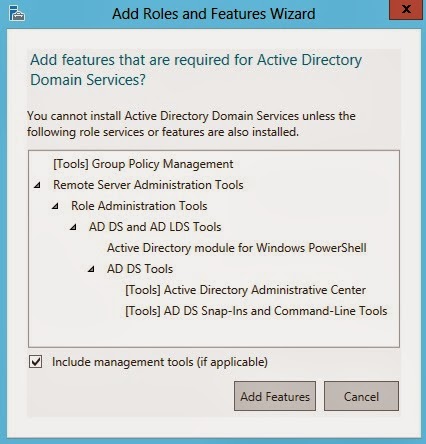
When installing AD DS role, the Wizard will prompt you that additional components will be installed (AD Domain Services and Lightweight Directories Services tools):
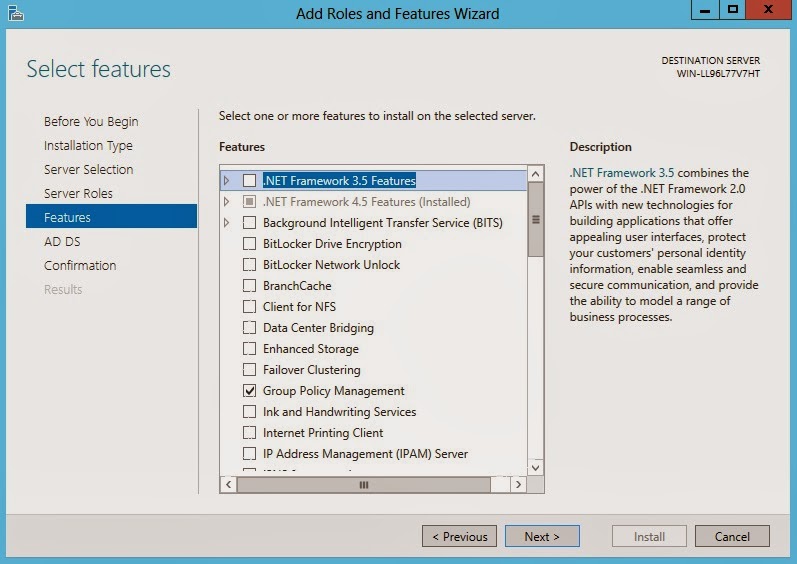
For now, there is no need to install any features, the wizard will automatically select any feature that is needed for the Active Directory installation:
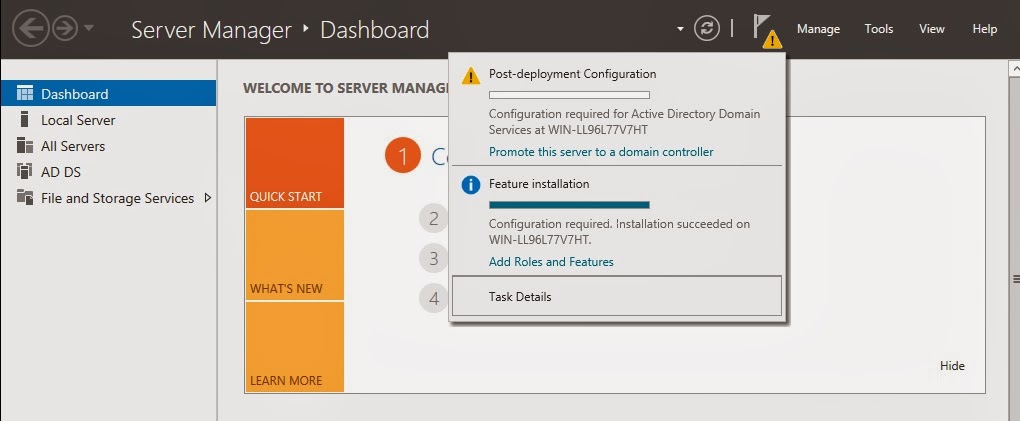
After the installation is completed, it's time to promote the server to a Domain Controller. Note that dcpromo command does not exist anymore and the promotion process is made from the tasks section in Server Manager:
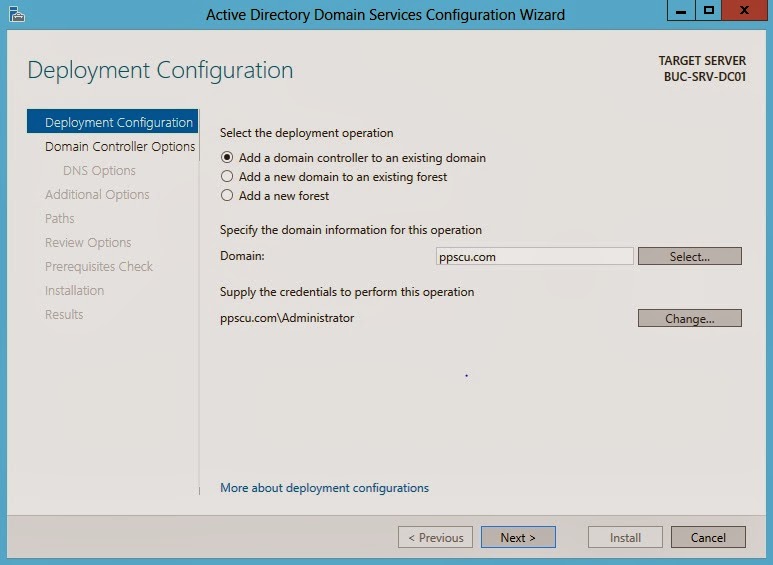
Click on the "Promote this server to a domain controller" link to start the promotion wizard. Select the option "Add a domain controller to an existing domain", specify the AD domain and credentials and click "Next":
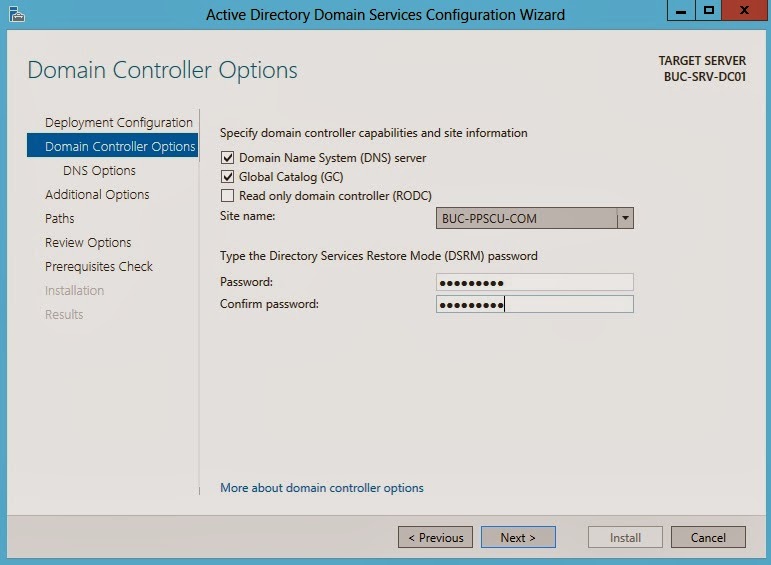
Because I want to migrate all my infrastructure to Windows Server 2012, I will also install the Domain Name System (DNS) service and I will configure this server as aGlobal Catalog (GC). You will need to configure a Directory Services Restore Mode (DSRM) password:
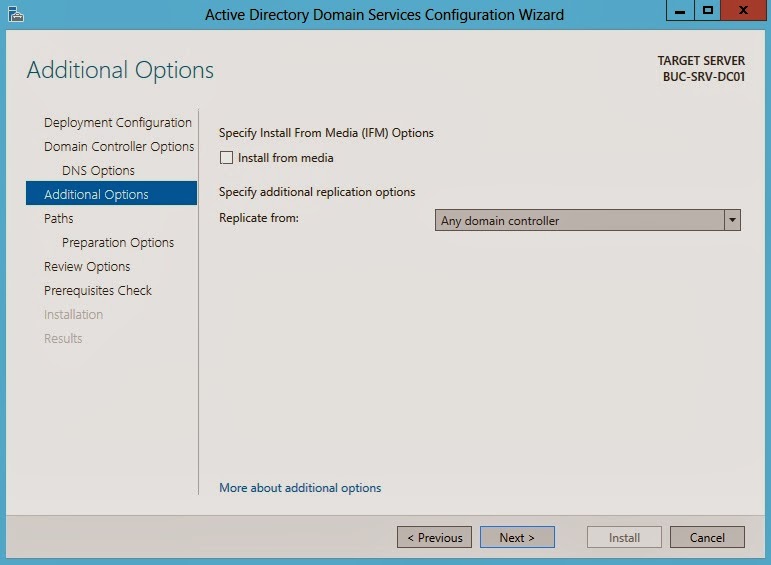
In the following section you'll need to specify the replication mode. If desired, you can enable the Active Directory replication from a specific Domain Controller:
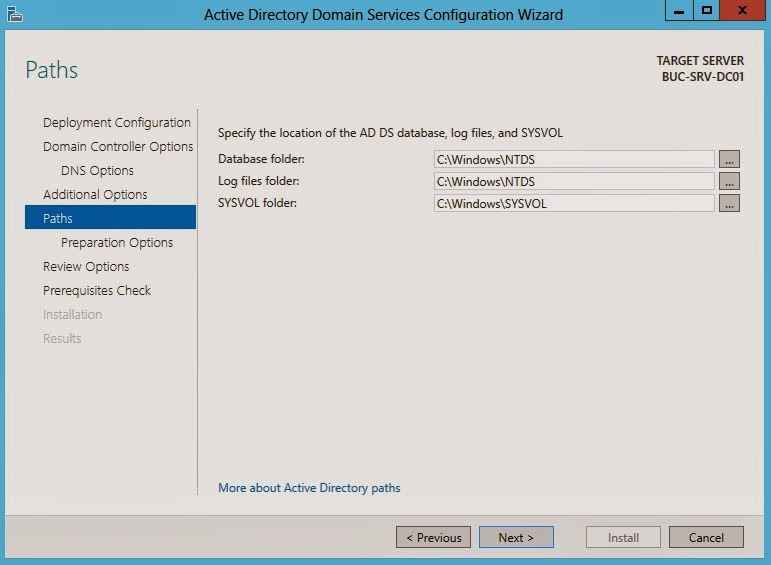
Next, you'll need to specify the Database, Log Files and SYSVOL folders:
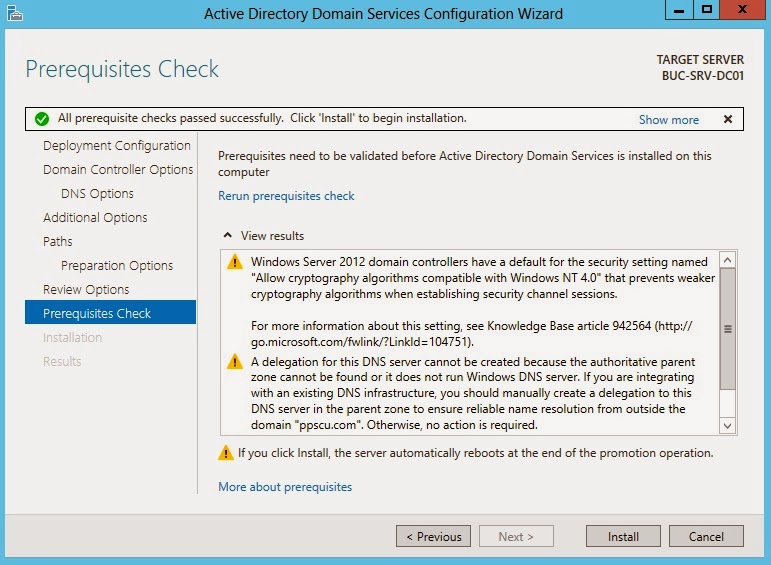
The server will perform a Requisitions Check and if this operation is completed successfully, the installation process will begin:
After the server is restarted it will be fully integrated with Active Directory Domain Services.
This is how you can add a Windows Server 2012 DC to an existing domain. Note that my domain is still running at the 2008 R2 functional level. Once I upgrade all my Domain Controllers to Windows Server 2012, I can rise the domain functional level. This article should be helpful when performing a domain or forest migration from Windows Server 2008 to Windows Server 2012.



0 comments:
Post a Comment